 |
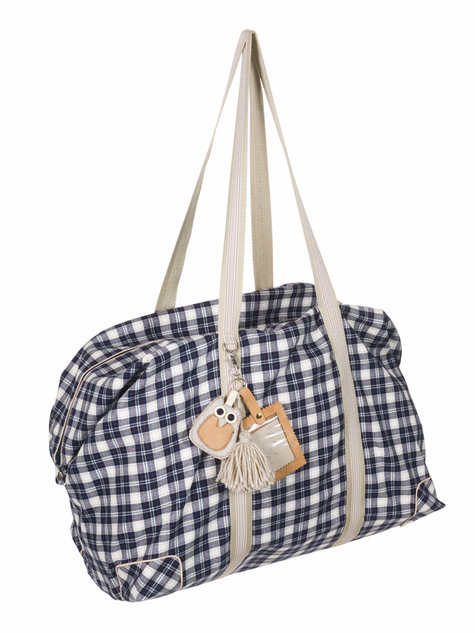
| burdastyle's version |

The pattern name is Overnight bag 12/2010 #142 (pretty creative name, huh???) and you can download it on Burdastyle.
You will need a 60 inch wide fabric to make the bag as designed. My
fabric was only 56" so, it is a little less deep than originally
intended. That slight modification was fine with me but I should have
shortened the straps accordingly. I might double back some of the top of the strap and sew it to itself to shorten it. First I want to use it a few times though before I make any changes.

Other
special materials required webbing or some other durable twill fabric
to create your straps, piping, hardware for the tag, and a heavy duty
zipper. I used some of the vinyl to make a luggage tag too.

I would classify this as an advanced beginner project. You have to draw out your pattern and the corners are a bit tricky. The techniques were just a bit new for me, but if you read the instructions slowly, the actual construction is not hard.
 |
| The corners are what really make this bag. |
I love the look
of this bag and how it is so functional. Other fabric great fabric
choices would be denim, heavy weight upholstery, and leather. It has a very boxy shape and I am sure I could stuff a lot in here.
Do you have "homemade" luggage?
If you are interested in hearing more from us, there are a couple ways for you to keep in touch!


Hi! Wow, love your Overnight Bag....the lime accents are awesome. I actually started making mine this evening...and between the instructions and drafting my pieces I am slowly going crazy.
ReplyDeleteI wanted to ask you a question if you don't mind......I am also using vinyl pieces for the corners like you did.....how did you end up constructing them? The pattern says to cut out 4 squares, however, I don't see how that works and I see from your picture you cut your vinyl squares with one corner removed.
The pattern says to attach them to the bag piece and later construct the corners....I don't understand how that works.
Any tips would be greatly appreciated!!!!!!! Thanks : )
I will try to help you out. I cut out the squares and then cut out the notch so I matched the corner(s) of the bag. Then I sewed it on to the bag by just placing it on the corner and stitching around the edges. Eventually, you sew up the corner and your notched area are the raw edges of the seams. I remember this part being a bit awkward but if you use some pins as you follow the instructions before sewing you will see it makes sense. I hope that helps. If you blog, send me the link so I can see your bag.
ReplyDeleteTHANK YOU! This was very helpful and the more I slept on it the easier the pattern directions became : )
ReplyDeleteI am almost done, just finishing up the corners by the zippers. Thanks again!